Official Guide: How To Make A Wet Signature In Word


This guide teaches you how to make a wet signature in Word.
It's very simple and 100% free.
How to Create a Wet Signature in Word
- Write your signature on paper.
- Take a picture of it.
- Transfer the signature image to your computer.
- Upload the image in Word.
Alternative: Use our online signature generator to turn your wet signature into a digital one and insert it in Word. Use the box below start:
Now, let's get to the steps.
1. Write Down your Signature
-min.jpg)
- Gab a piece of paper
- Write your signature on it.
Best Practice: Use a white, blank piece of paper and write with a black, blue, or red pen when writing your signature.
2. Scan (Take a Picture)
-min.jpg)
- Open the Camera on your phone/tablet
- Take a picture of the signature
It's very important to take a well-lit picture of your signature. Make sure that no shadows cover your signature so that it will be 100% visible.
Oh, and also...
- Crop the image or zoom in to properly fit the picture.
- That's what we've done after taking the picture you saw above.
Related: How to scan a signature.
3. Transfer to your Computer
Now you want to transfer the picture of your wet signature to your computer, where the Microsoft Word document is.
Note: If you have Word synced between your computer and the device that you're taking the picture on, you can use Word on the scanning device to upload the signature on the document.
Changes automatically sync to the computer.
Now, to transfer your signature image:
- Use a cloud service like Google Drive or OneDrive.
- MacOS and iOS users can use Apple AirDrop to send pictures faster.
4. Insert the Wet Signature in Word
Once you have the wet signature's picture in your computer, follow these steps:
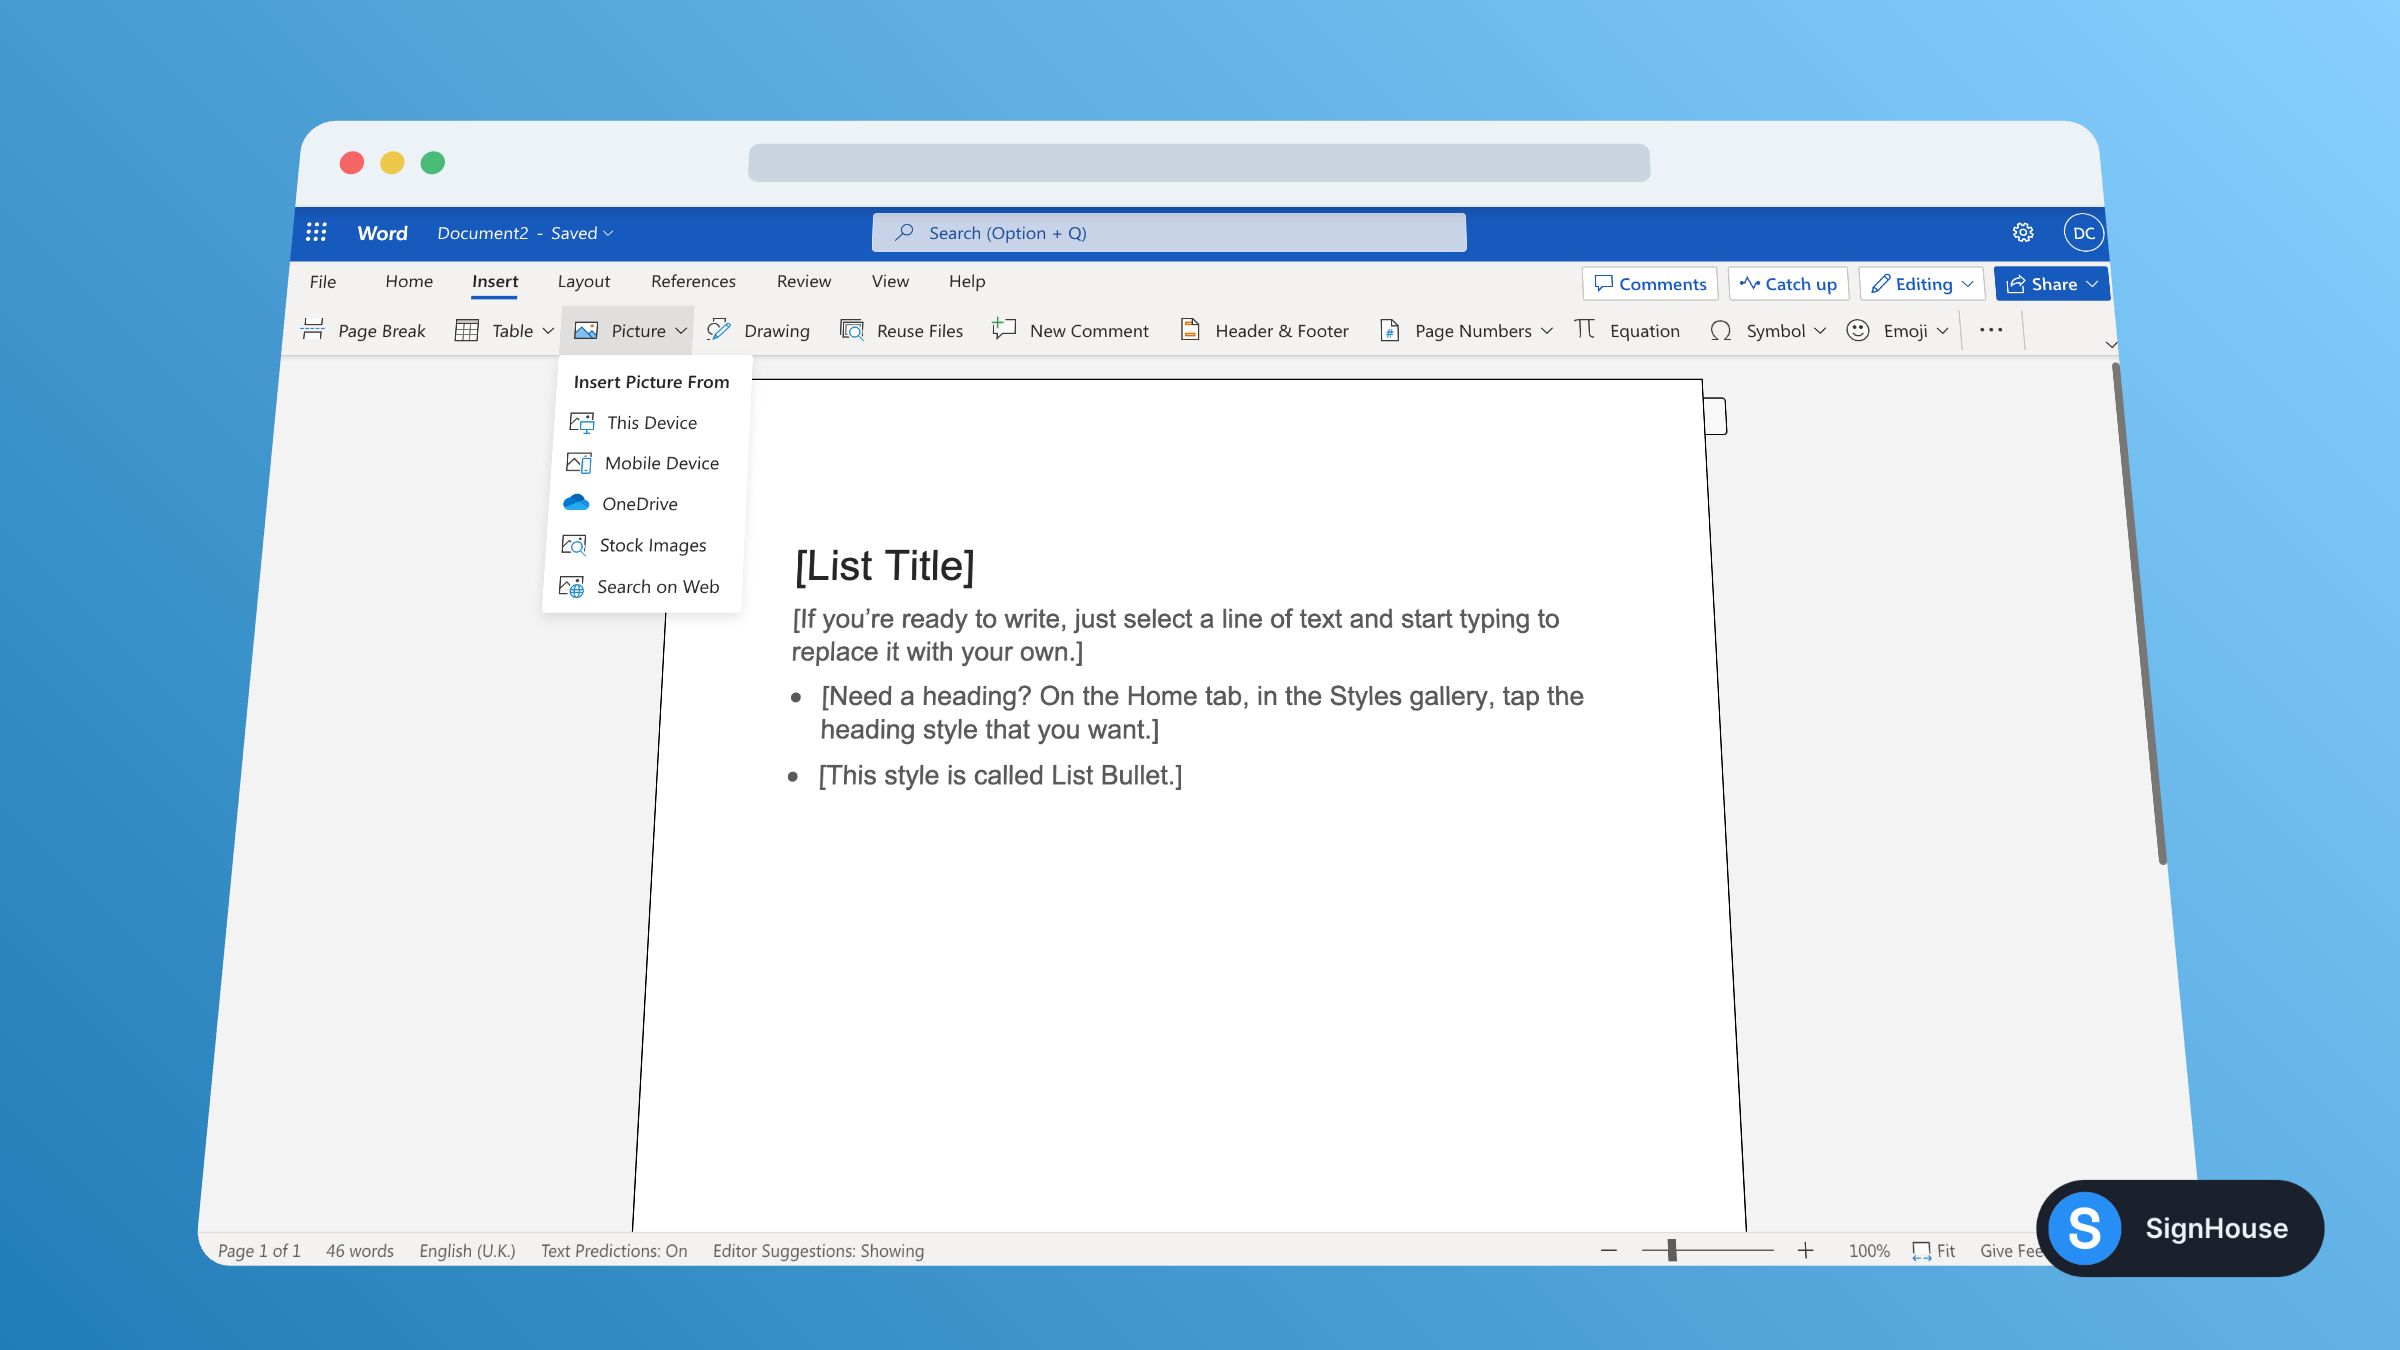
- Open the Word document.
- Select Insert (top-left corner).
- Choose Picture → This Device.
- Upload the image → Click Insert.
- Place your wet signature.
- Save changes.
Alternatively, you can also copy your image and paste it anywhere in Word. Then, drag it around and resize it until it fits the profile.
This is the most efficient method to create a wet signature and add it in Word.
Related: Draw your signature in Word directly, the easier way.
FAQs
How do you make a wet signature?
Create your own wet signature on the spot: Grab a piece of paper > Get your favourite pen > Write your name or initials to represent yourself.
Can I do a wet signature electronically?
Yes, you can create a wet signature electronically. There are multiple ways for it:
- Upload a picture of your signature to a signature scanner (our is free);
- Print your document, wet-sign it, and then scan the file;
- Create your electronic wet signature with a software like ours.
How to add a signature in a Word document?
Adding your signature to a Word document is easy:
- Click where you want to add the signature
- Select Insert in the top menu
- Choose Signature
- Add it to the document
Can you add a handwritten signature in Word?
Yes you can! You can either draw a signature by hand, or add one if you already have it

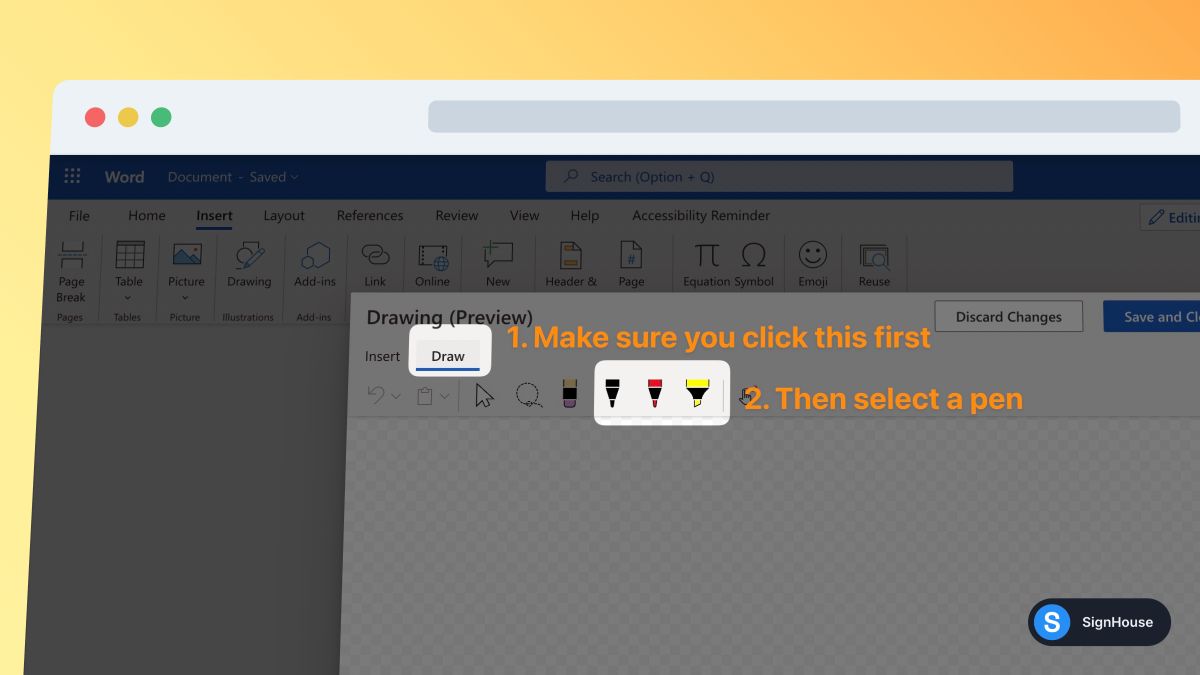
To draw a handwritten signature in Word:
- Click “Insert” in the top bar
- Select “Drawing”
- Make sure you click “Draw” as the 2nd option → then select a pen
- Start drawing your signature
- Click “Save and Close”
- Once you signature is added, make sure you resize it, as MS Word makes it full-width by default. Voila! That’s your signature.
This will definitely work better on a laptop with a touchpad, rather than with a mouse on a desktop device. Or, probably the best way, with a pencil on a tablet.
To add a handwritten signature in Word:

- Open up Word
- Go to “Insert”
- Click “Pictures”
- Click “This Device”
- Upload your signature’s photo
Want more of this, for free?
About the author
Ch David is the co-founder of SignHouse. David is here to help the product development team expand the capabilities of ultimate eSignature maker for all your needs. Join David and the SignHouse team in stepping up electronic signatures!
.svg)


.webp)
.webp)


.webp)
.webp)